Obsessive. Hands-down an accurate way to describe my personality. And when I stumbled upon some flip-over mods I became…obsessed. I was a pop-up hub ice fisher and had no real desire to move to the flip-over. I had my Pelican sled that I would load with my tent, buckets, tackle box, shovel, auger, chairs, lights, scoops, you name it. What I liked was how transportable it was. Living in a condo at the time I didn’t have a garage, or any decent outdoors storage. So I would pull my sled in to the condo – put the tent in the bath tub to thaw out, and the rest would sit by the door until the next outing. In the off-season I would store the gear off-site.
When I had looked at flip-overs – those big, bulky, heavy, can’t really tear ’em down each time you come home sleds – I had no desire. Until…
A dear friend to me had one that wasn’t going to be used. Her late father owned it and the family asked if I had any interest in it. Originally I had declined – I had my hub after-all. But then…then I found the ice fishing sub-culture of “tricking your trap”, and I reconsidered.
I’m the type of person that will go all-in with a project. And, well, this was no different. I knew the potential to “trick this trap” and I had a vision. So I up and sold my pop-up in the fall of 2021. Now I was committed!
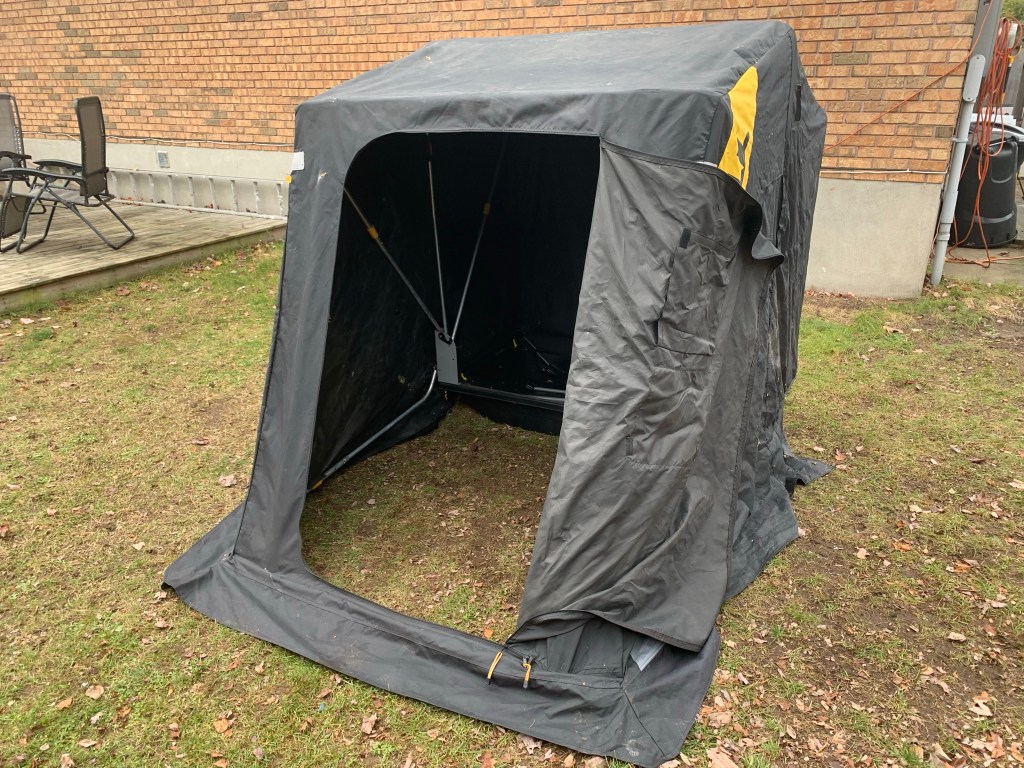
I inherited a Frabill (what I believe to be a) Trekker II. It was an empty tub which gave me lots of room to work with.
The tub itself was approx. 7.5″ deep. I knew for this to work I would have to raise up the decking not only for seating and comfort – but to make the storage in the tub worthwhile.
Design ideas were poured over for hours upon hours. I must have looked at every documented flip-over mod that the Internet has to offer: critiquing designs, space and functionality. Thanksgiving weekend was spent with the brother-in-laws brainstorming ideas and drafting professional mock-ups on cocktail napkins.
Finally, in December 2021, I really committed. Supplies had been ordered. Home depot carts were set up. I was prepared to trick this trap to the point that I’d want to live in it – or at least spend a day or so at a time in it.
Wish list:
White overhead lights
Red overhead lights
White ground lights
Fish finder power
USB charger
Bluetooth speakers
Cup holders
Heater fan
Built in seating
Accessible storage for all gear
Carpeted decking
That’s what I wanted (needed). I’ll include a parts list and where you can order them at the end of the post.
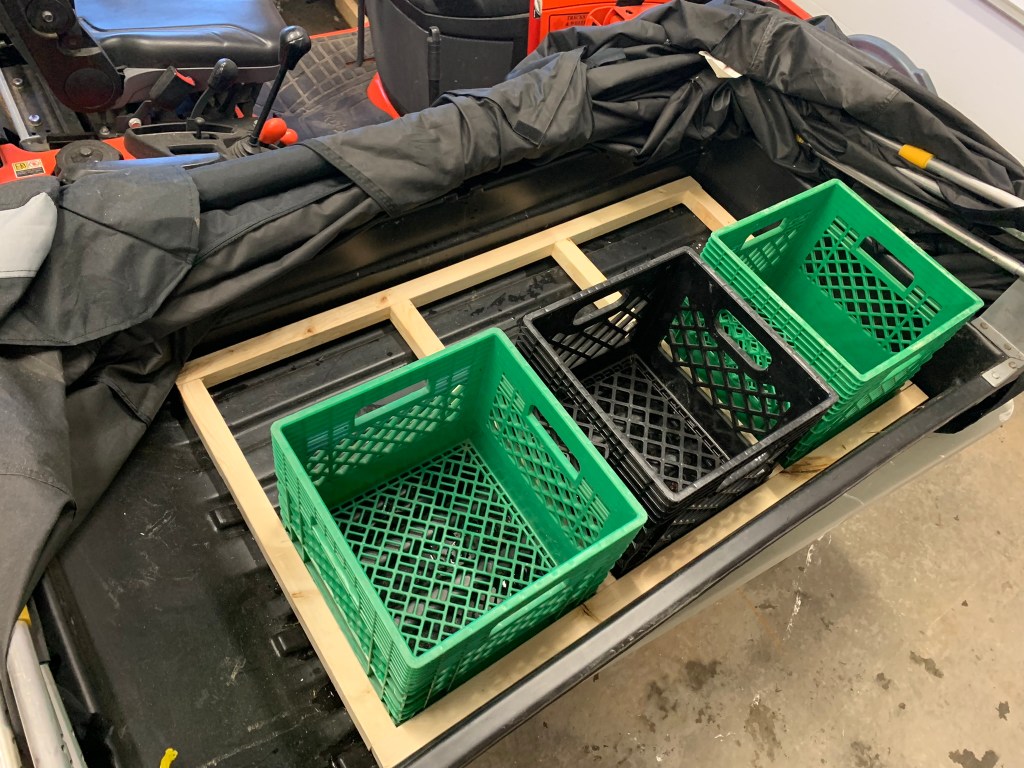
I decided to integrate milk crates in to the build for a couple of reasons:
1) Integrated storage – wouldn’t have to build any additional storage/dividers
2) Add structural integrity to the seating areas – those crates are tough!
When I described my vision to people I always seemed to end with – ‘But I think once I get the materials and get it on the sled it’ll start to evolve’. This was difficult to measure out on paper without practically working on it. I knew how wide the seats were…I knew how wide my electrical panel was…but until I got the plywood on the sled and started to measure and cut – it was all up in the air.
Once I had the milk crates in the vision really took off. The entire build took about two days but once the milk crates were in and framed – the time flew by.
I started by framing the three milk crates with 2x2s. They are light weight (*more on this later – because I know you are dying to ask how heavy it is…) and would keep the crates squarely in place.

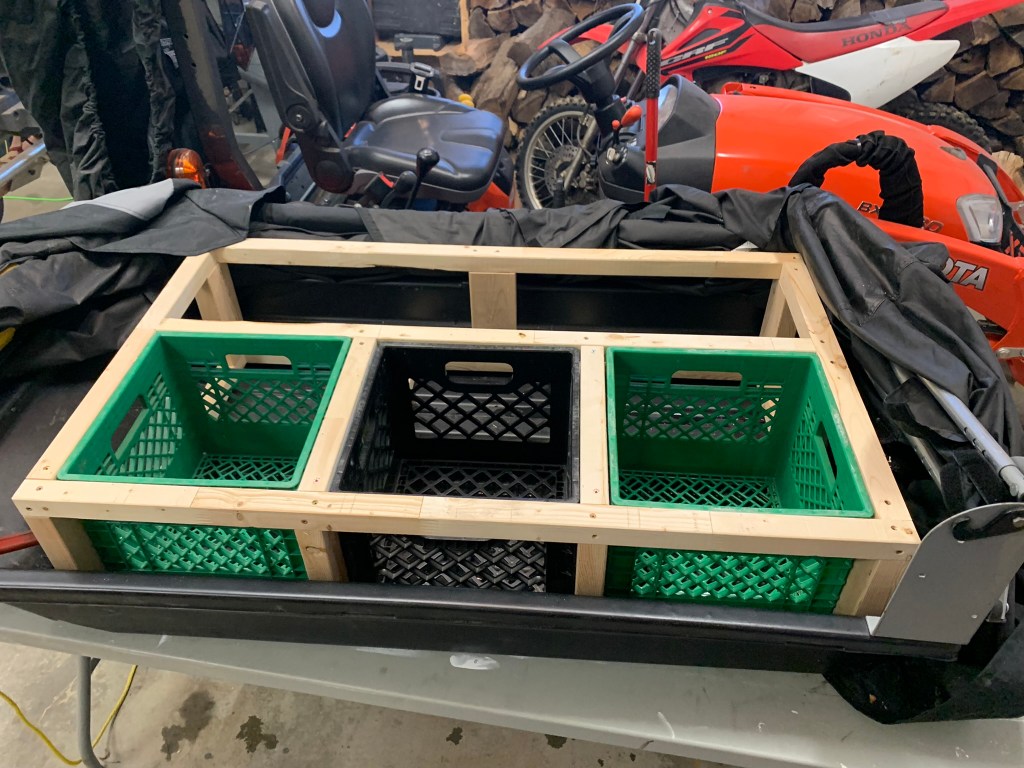
I foolishly ran out of 2x2s so, rather than go back to Home Depot, I did supplement a couple of the supports with 2x4s. Meh.
Once the milk crate frame was completed I became more excited. This was a milestone. I was past flying by the seat of my pants here – we were at cruising altitude!
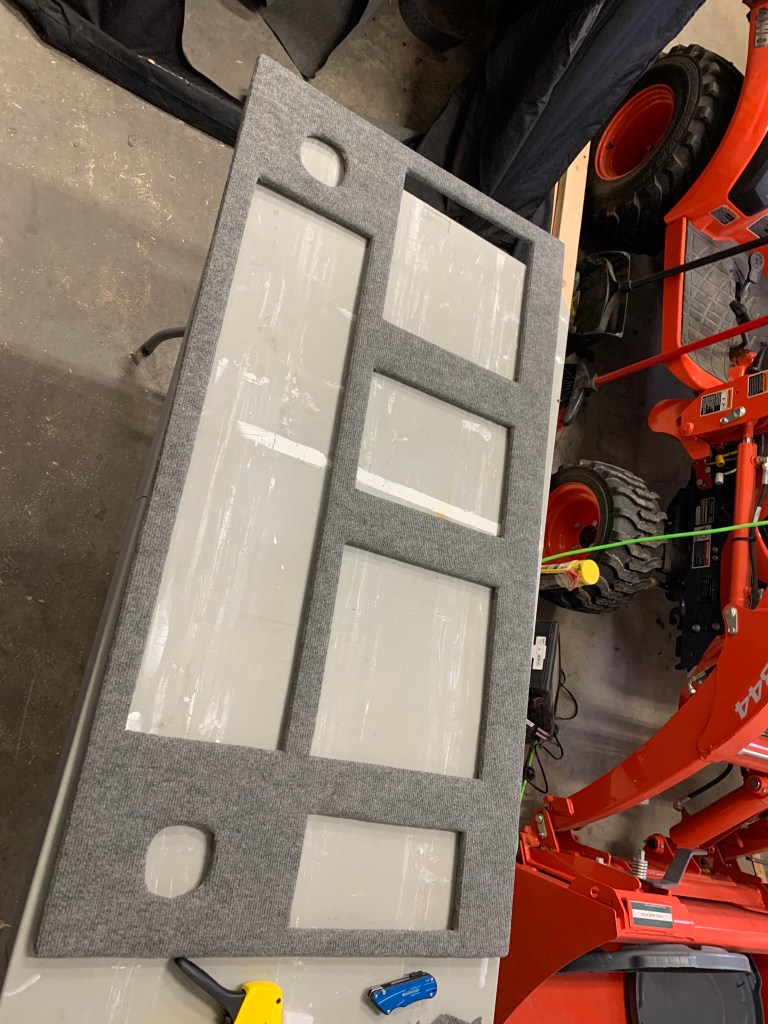
Next was to work on the platform. The top of the build. For this I used 1/2″ sanded plywood (the good stuff….). I traced out where the milk crates would sit and made the holes large enough that I wouldn’t lose storage space.
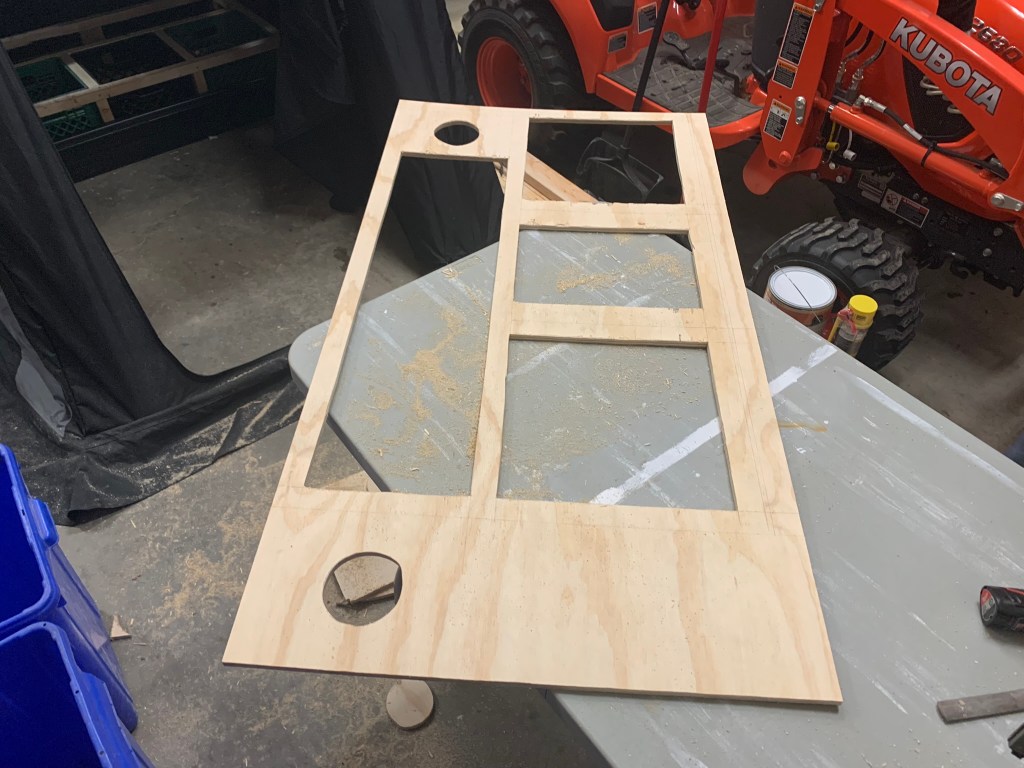
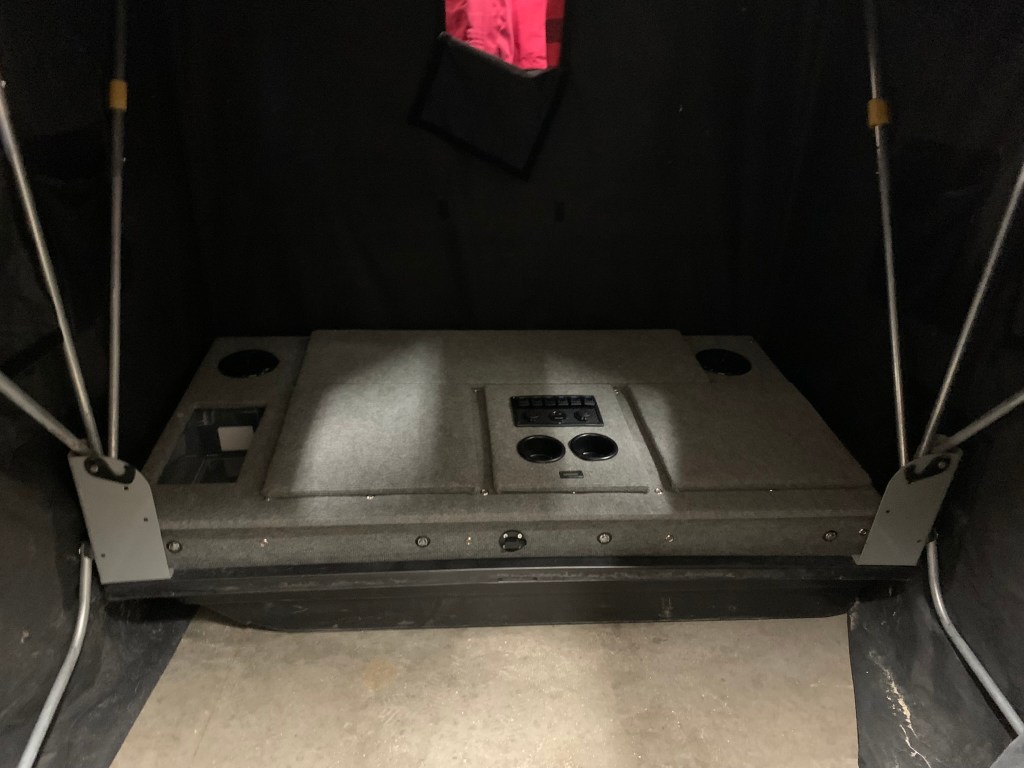
The idea behind the long cut out was to have storage for my auger, scoops, rods, etc. Anything that I bring that needs a little more length to store – as the milk crates are only 13″ square. The two circular holes are for marine speakers. The two square holes are where the seats will be. The middle, smaller, rectangular hole will be for the battery/electrical.
My plan here was to have the lids for each section sit on top of the plywood – easier and added support was my rationale.
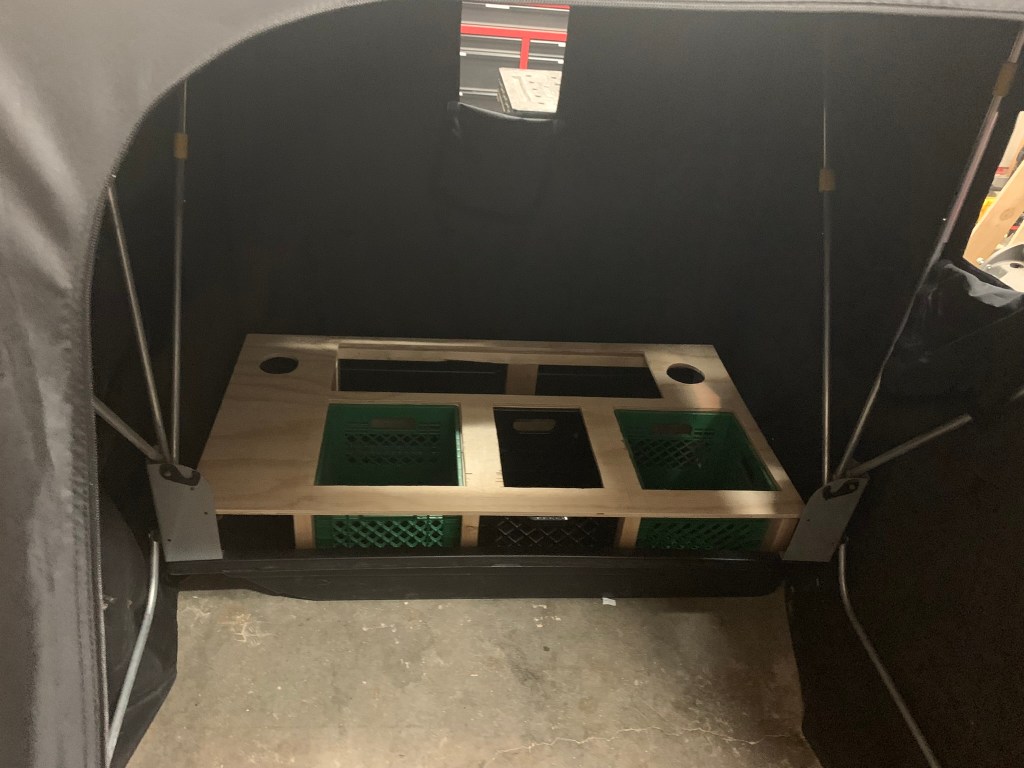
People have asked why I didn’t center the seating/electrical console/the milk crates in general. The section on the left (if you look at the above photographs) is where the sled curves. I saw some people build in supports on an angle there, however, I didn’t want to go there. I ended up using that area for wiring and the glow box. The reality is I usually go ice fishing solo – so I wasn’t too worried about needing space between the seats – and, as it stands, there’s plenty of room.
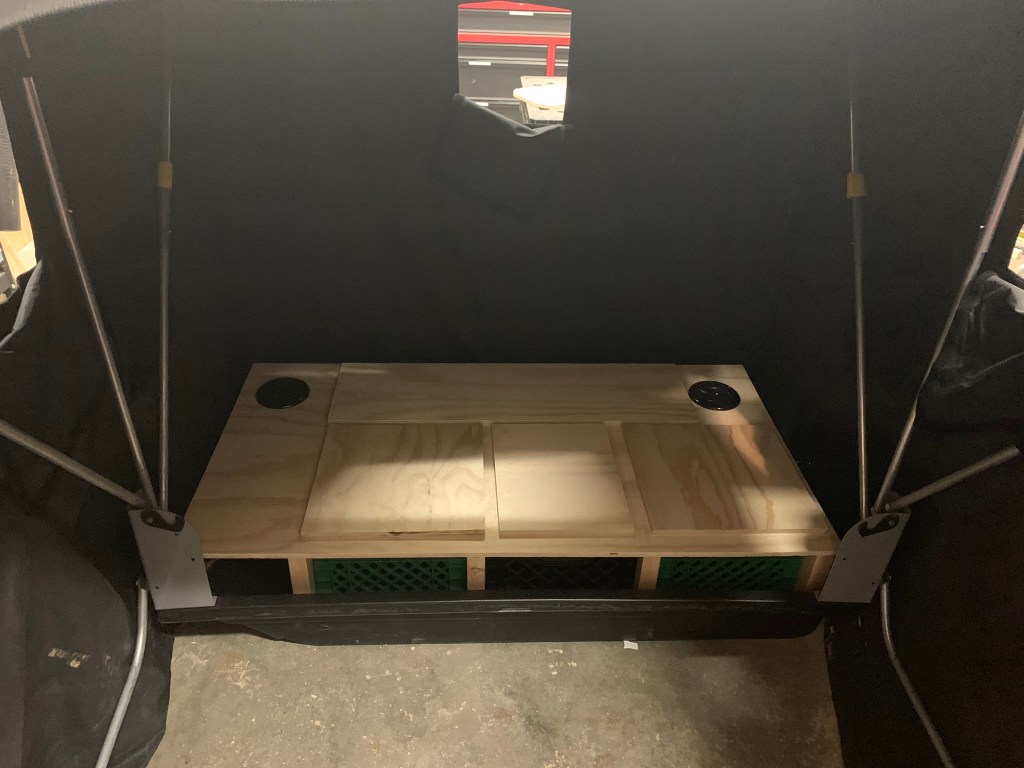
Skipping a bit of cutting process – for some reason I didn’t photograph the glow box or the electrical cut-outs until later. The carpeting was next:
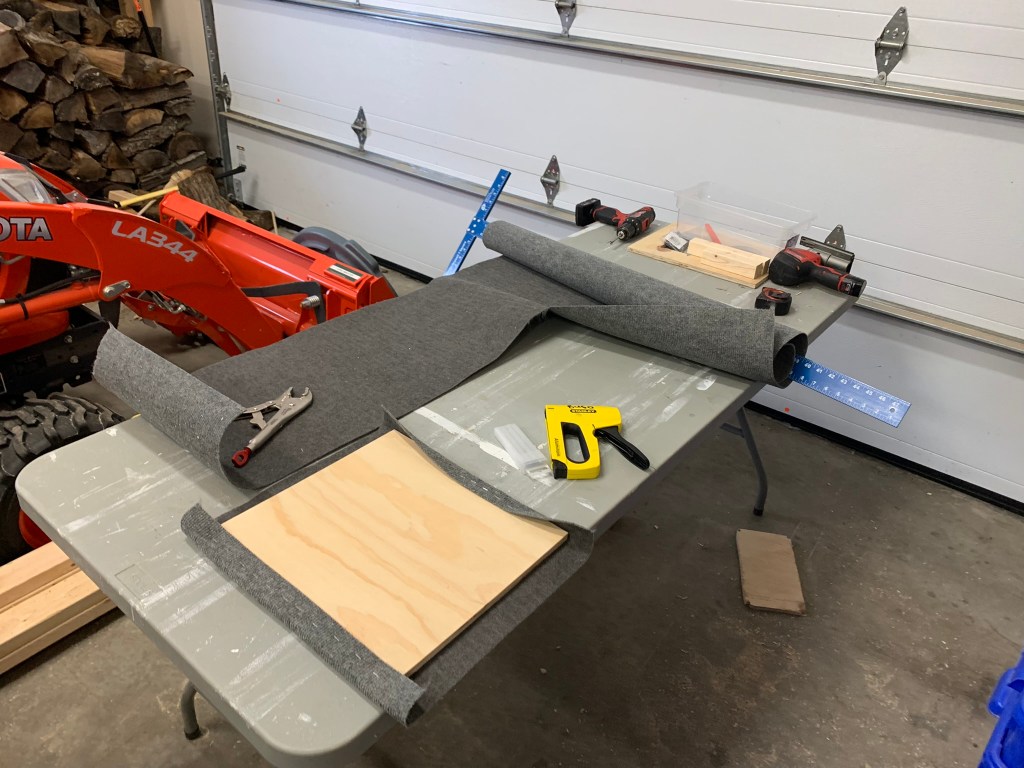
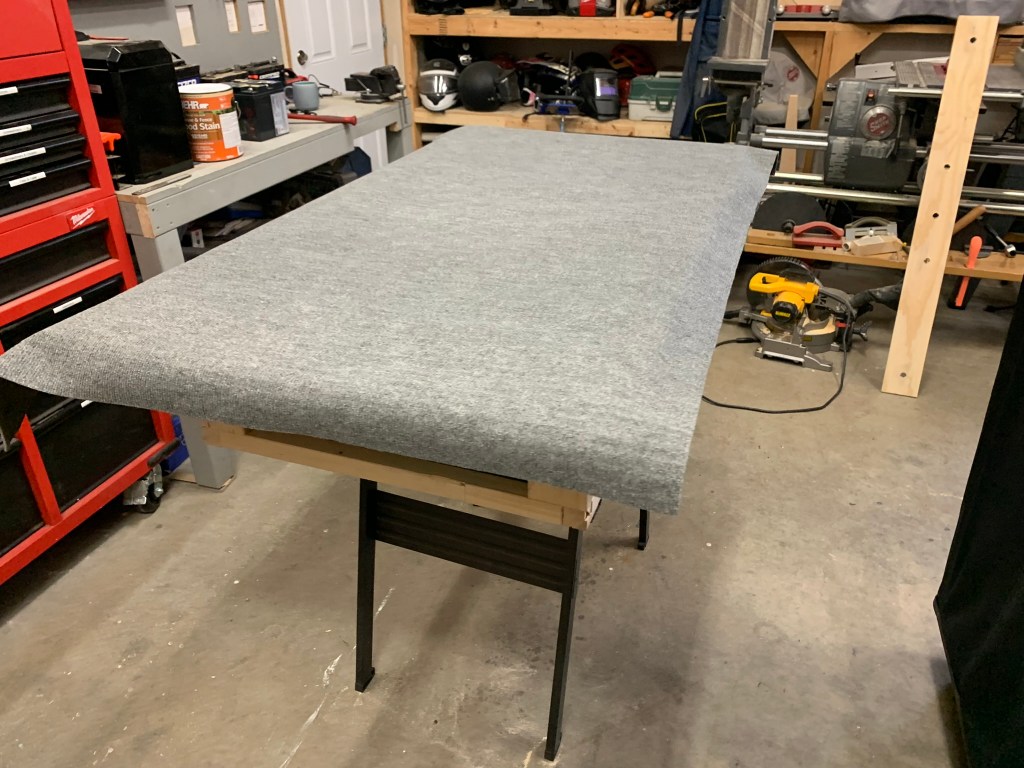
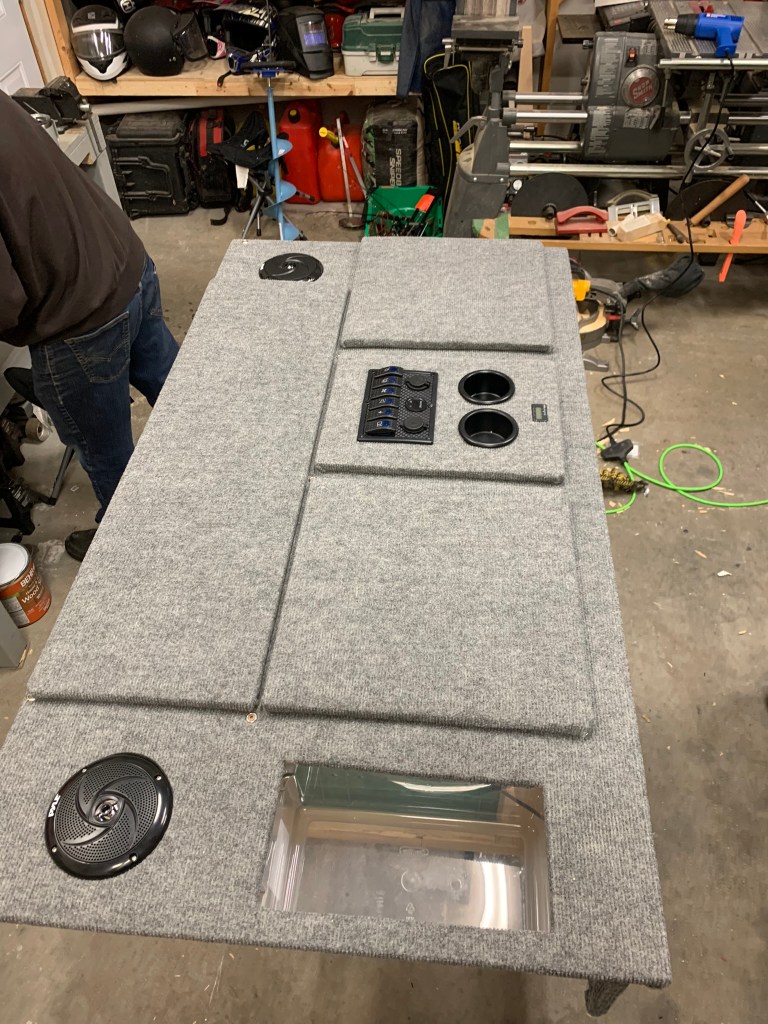
Before carpeting I did use a weather seal on all the wood. I used Indoor/Outdoor carpet from Canadian Tire for the covering. I didn’t bother using any glue as there really won’t be anything on top of this (directly). We did the stretch and staple to secure the carpet. I was very pleased with how this looks.
The part I was most excited about was the middle lid where I would be mounting the switches and cup holders. Take note – need a little bit extra space after carpeting – measure accordingly!
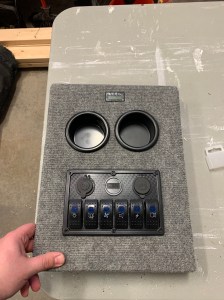
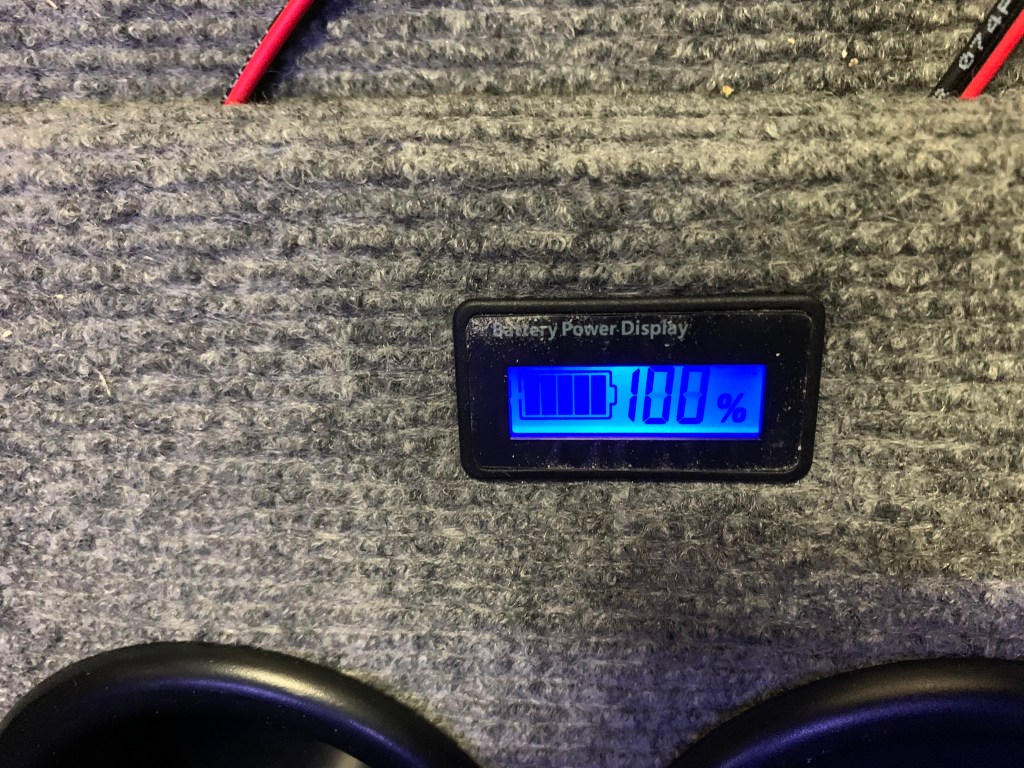
Yes…I am aware the battery display at the top is off center…it makes it unique.
Had to test again at this point. It was very satisfying to see it coming together:
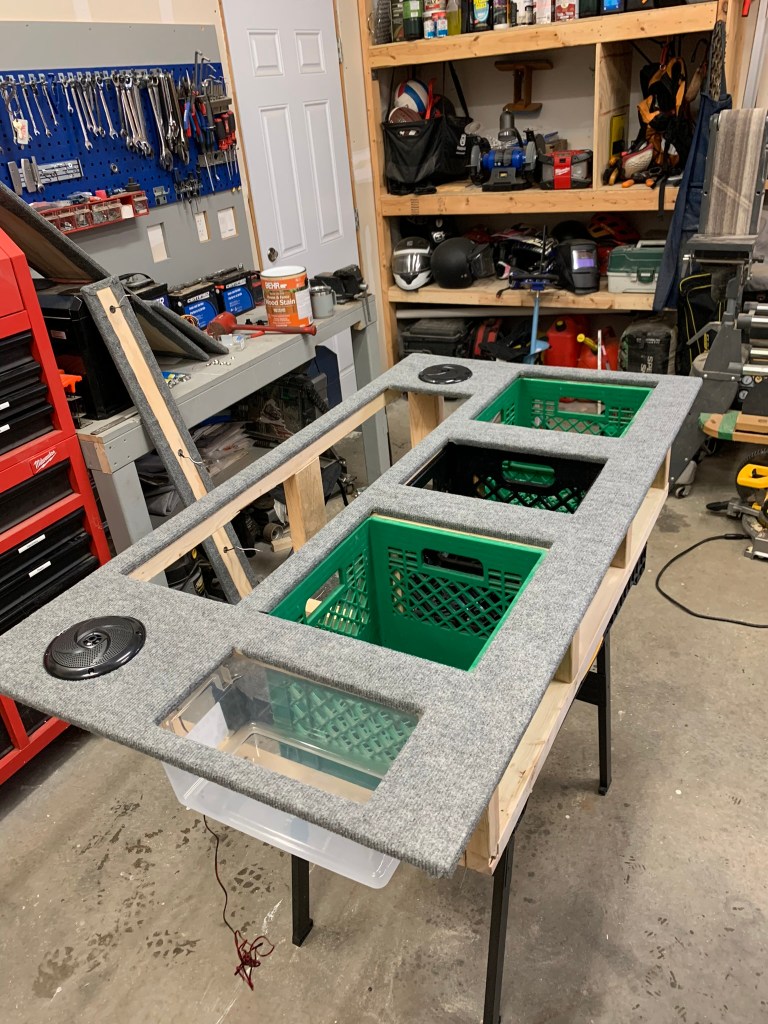
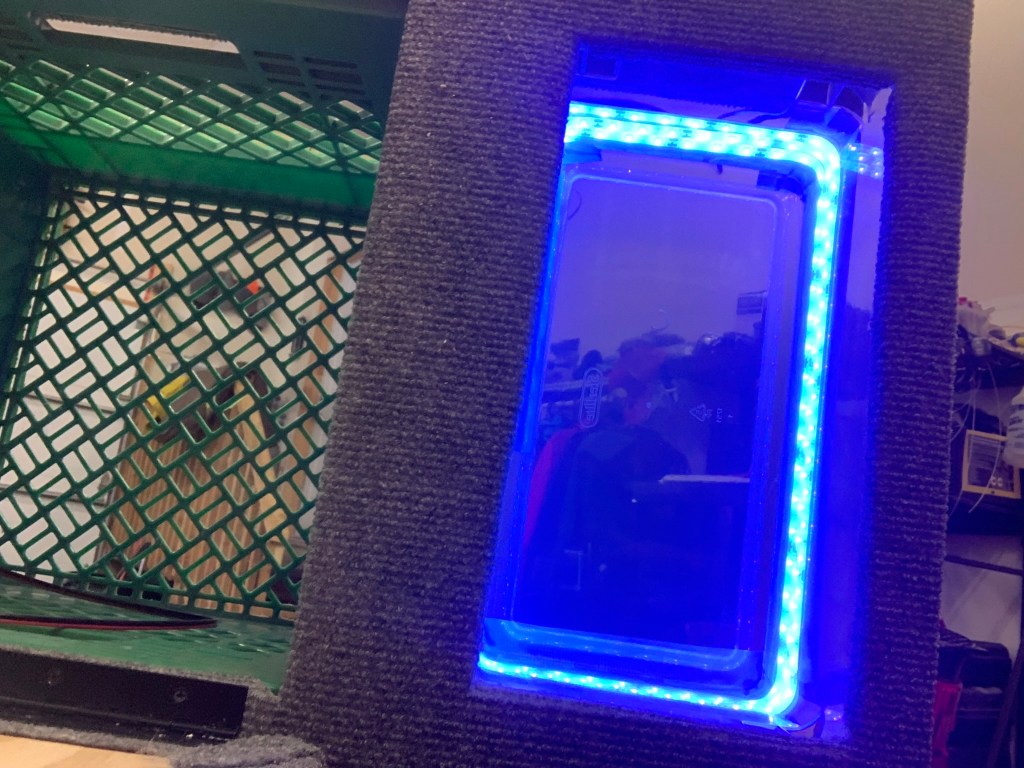
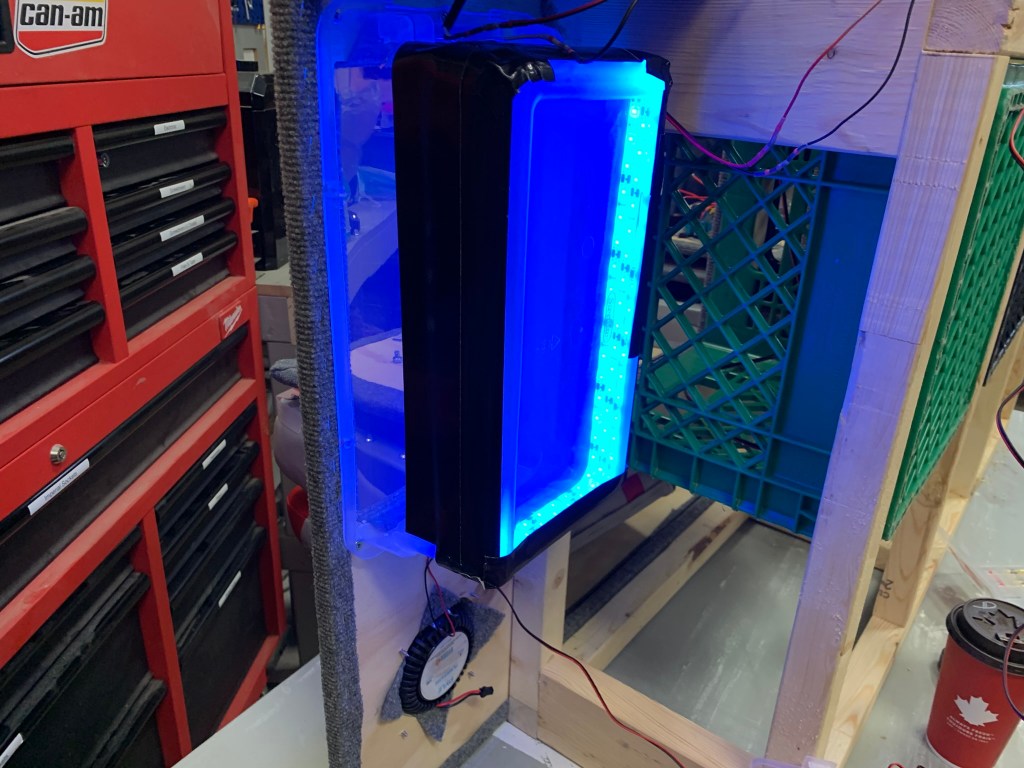
In the above photographs you can see the glow box. This is a small container that I picked up from Canadian Tire. I fastened it to the plywood using screws through the lip of the container. For this box my plan was to use it to charge UV lures, but also act as a ‘catch-all’ if I needed to throw something in there quick – like pliers, knife, sandwich, etc.
To connect it all together I used deck screws with with Countersunk Finishing Washers. The washers made it look good and kept the screws from just plowing through the carpet.
What I haven’t mentioned yet is the face of the build. There was about a 5-6″ gap between the top of the sled and the the plywood. I had a remaining strip of the plywood that fit in here perfectly. Right before starting the carpeting of this strip I decided to throw in some LEDs I had left over from a power box build (more on that here) and a SAE port (for charging the battery mostly – but could also run an accessory off of it).
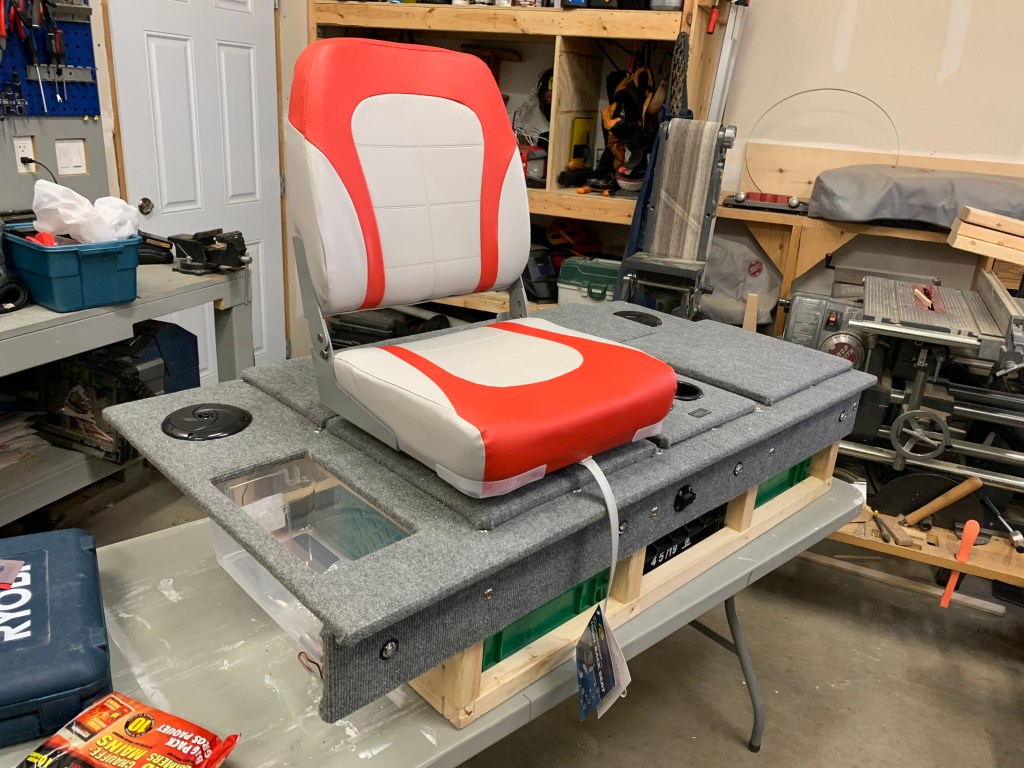
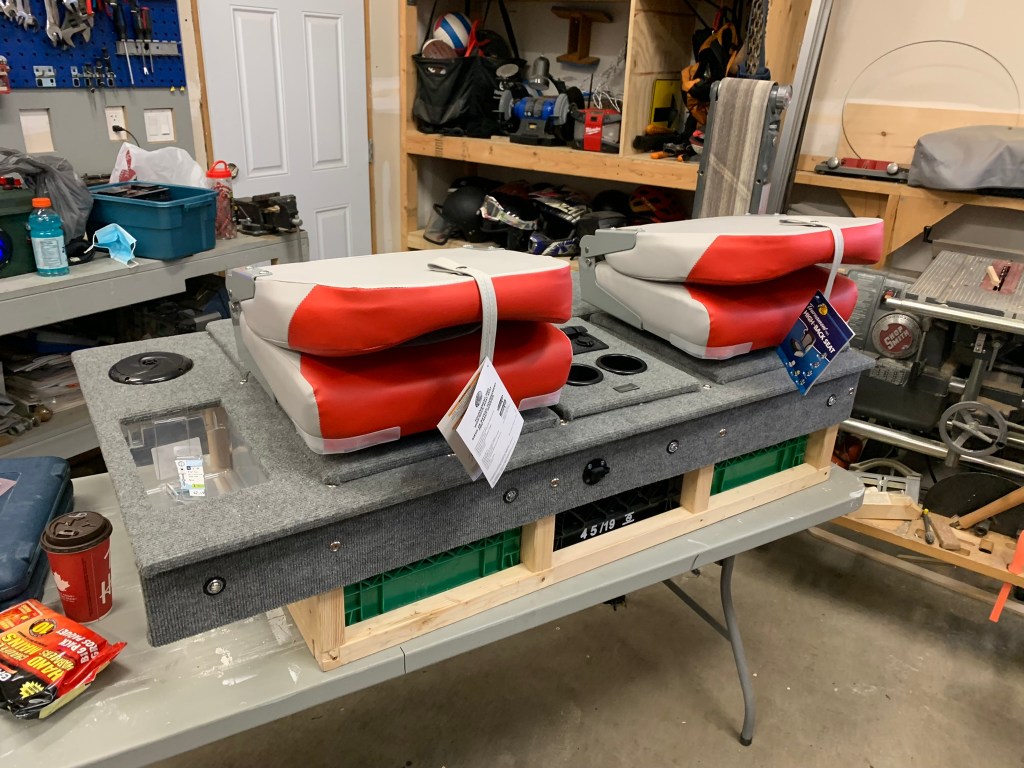
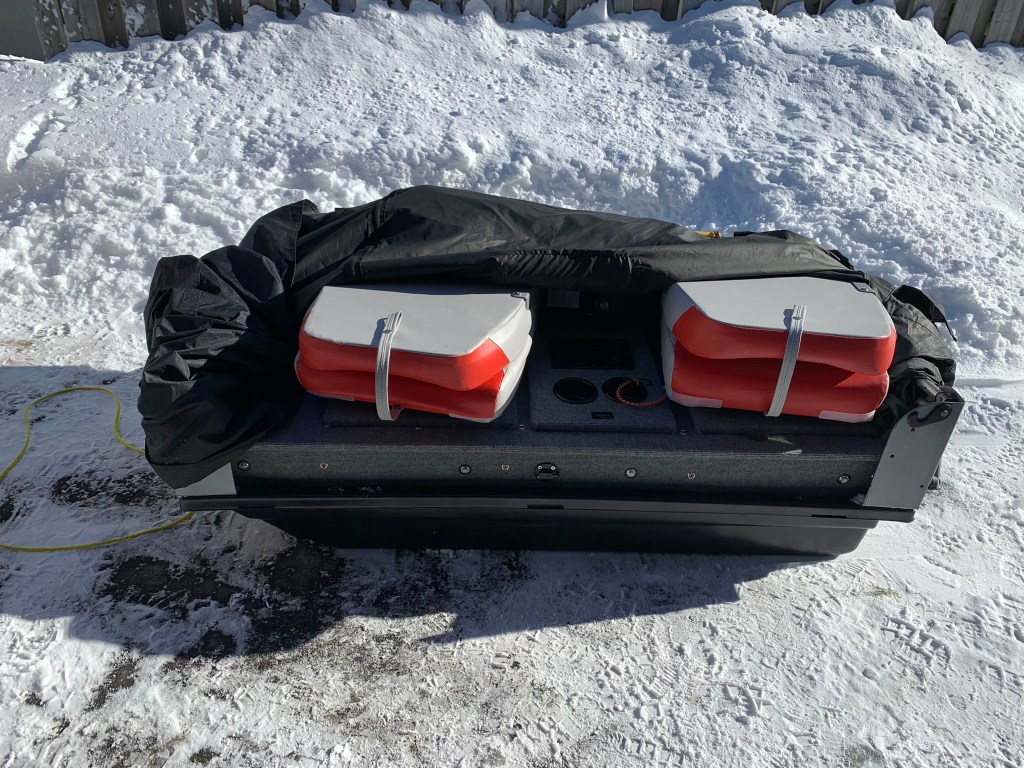
The electrical was important to me and I enjoyed planning that out. But one of, if not THE, most important parts was the seating. As the build stood at this point, you COULD just sit on it and be OK. It was high enough now that I wasn’t squatting on the ground, but I knew that I needed good seating to be able to spend a significant amount of time on the ice with this bad boy. I hummed and hawed for a long time about the seats (as well as pretty much everything else with this build, I guess!). I ended up deciding on some high back boat seats from Cabela’s.
While I had the build out of the sled it was time to work on the glow box and electrical. For the glow box I used UV string lights from Wish. I wrapped them around the box a few times and then fastened with Gorilla Tape.

Then…the wiring. This took me a little longer than I anticipated mostly, I imagine, because I didn’t really “plan” it per se. But knew what needed power and just started going. I used my power box for a lot of testing components and wiring. I didn’t want to drop the battery in yet with so many wires hanging around but didn’t want to be finished a find an LED not working.
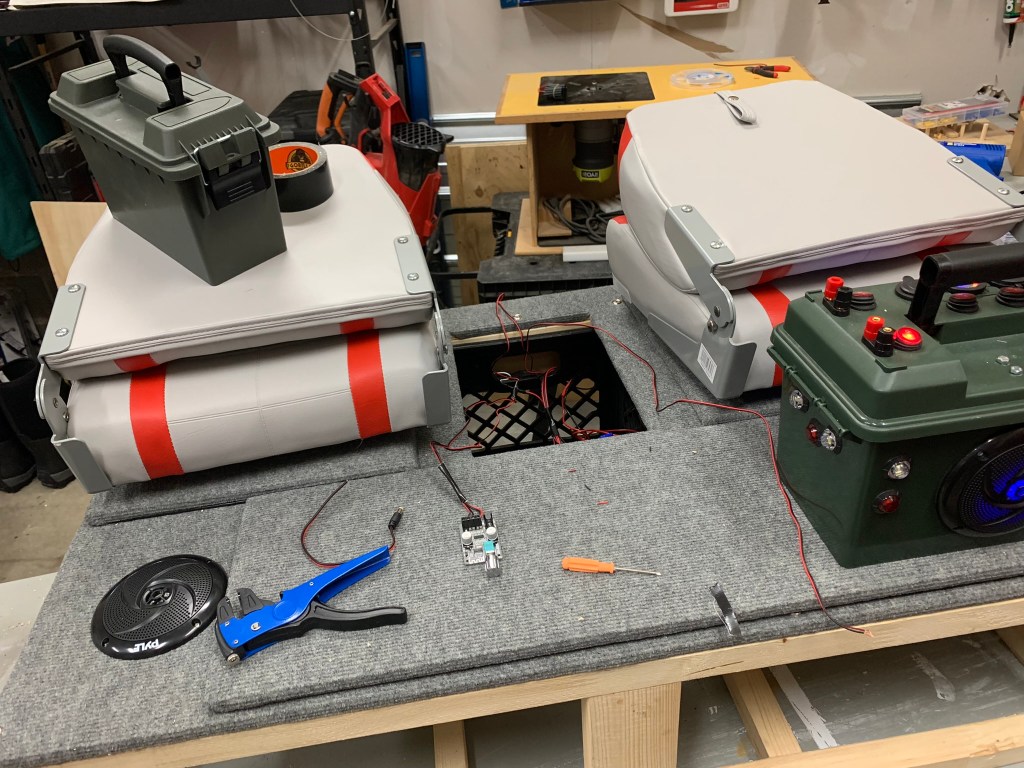

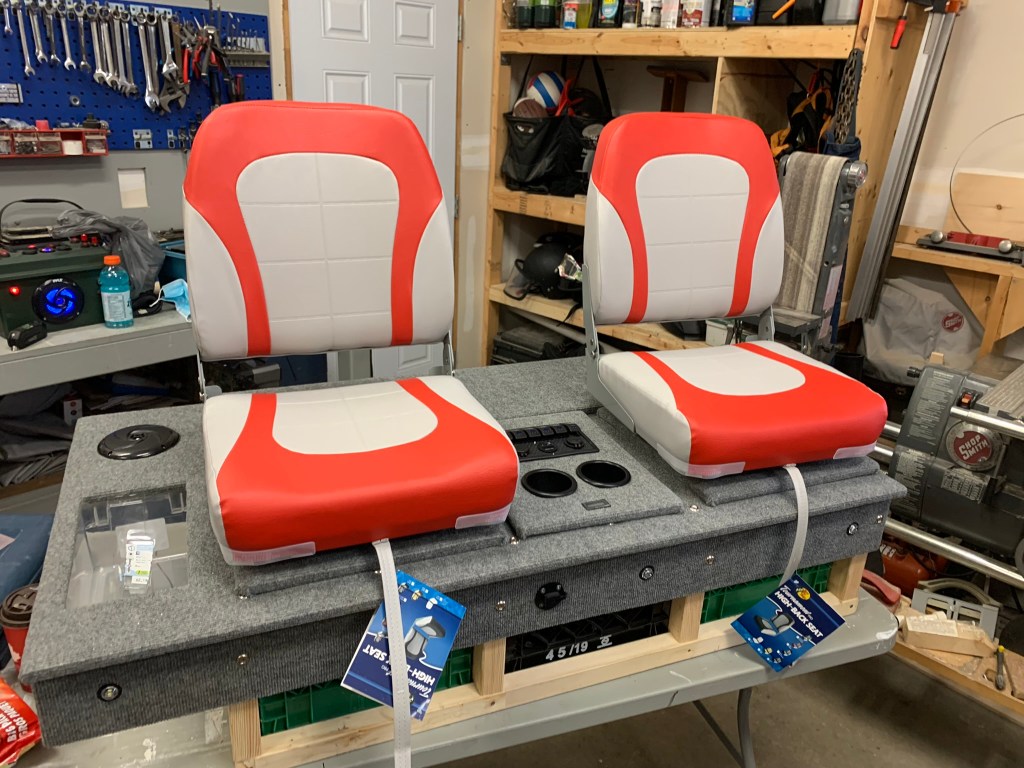
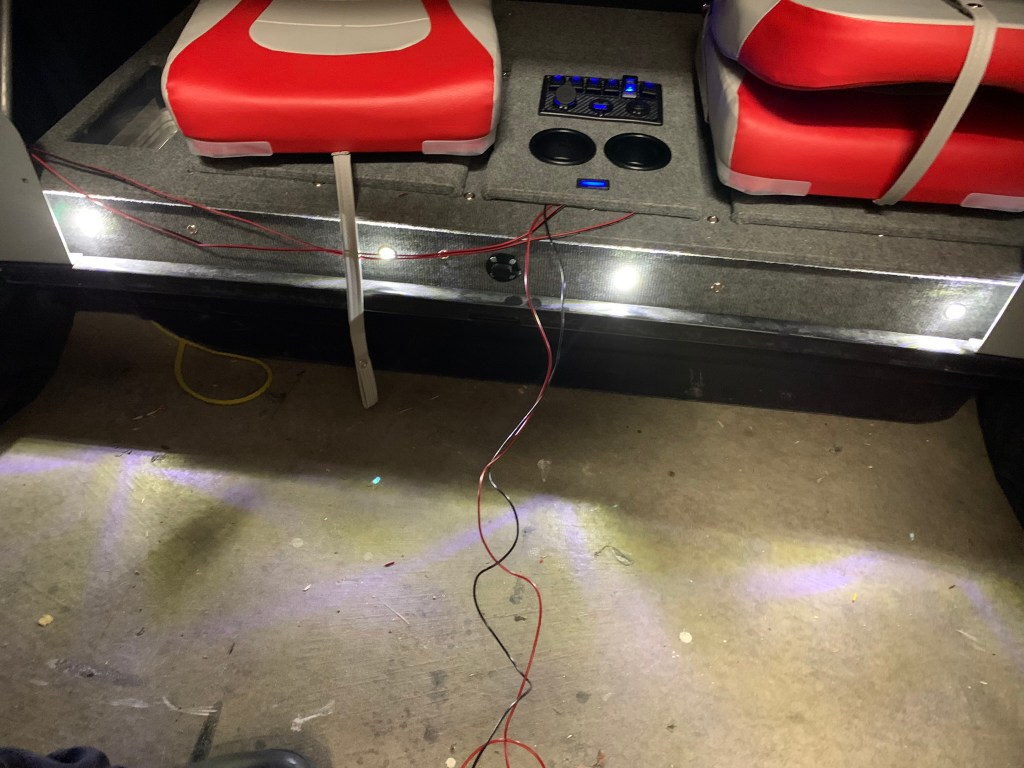
For the console I used a 6 switch panel with cigarette lighter, voltmeter and 2x USB ports. The planning for the switches was (from left to right): white overhead lights, white ground lights, red overhead lights, glow box, bluetooth/speakers, heater fan. The cigarette lighter port, voltmeter and USB ports were all connected to the master power switch so when the master is thrown – those all come on.
The wiring was pretty messy when I was finished, but it worked, so I was content. Then it started to bug me. So one afternoon I decided to pull the build out of the sled and to “clean up” the wiring a bit. When I lifted the insert the middle milk crate (which had my 17aH SLA batter) fell out and ripped a lot of the wiring. So, I learned a lesson, and ended up re-wiring everything. While incredibly frustrating, it did give me the chance to clean everything up.
Inside the middle console I used a plastic 30cal ammo box to house the wiring and master switch. I had some of these boxes left over from power box builds and figured it was a perfect fit. For the overhead lights and heater fans I used banana posts in the ammo box for connection. Could’ve wired direct, but this gave me some more flexibility in what can be connected and also easily removed for transport, etc.
I’m a big fan of that master switch. Aside from feeling like I’m priming a nuke, I like the protection against accidentally throwing the switch in transit. There’s nothing really loose in there but if the box happened to come loose and smack the lid or something, I know the switch isn’t getting thrown.
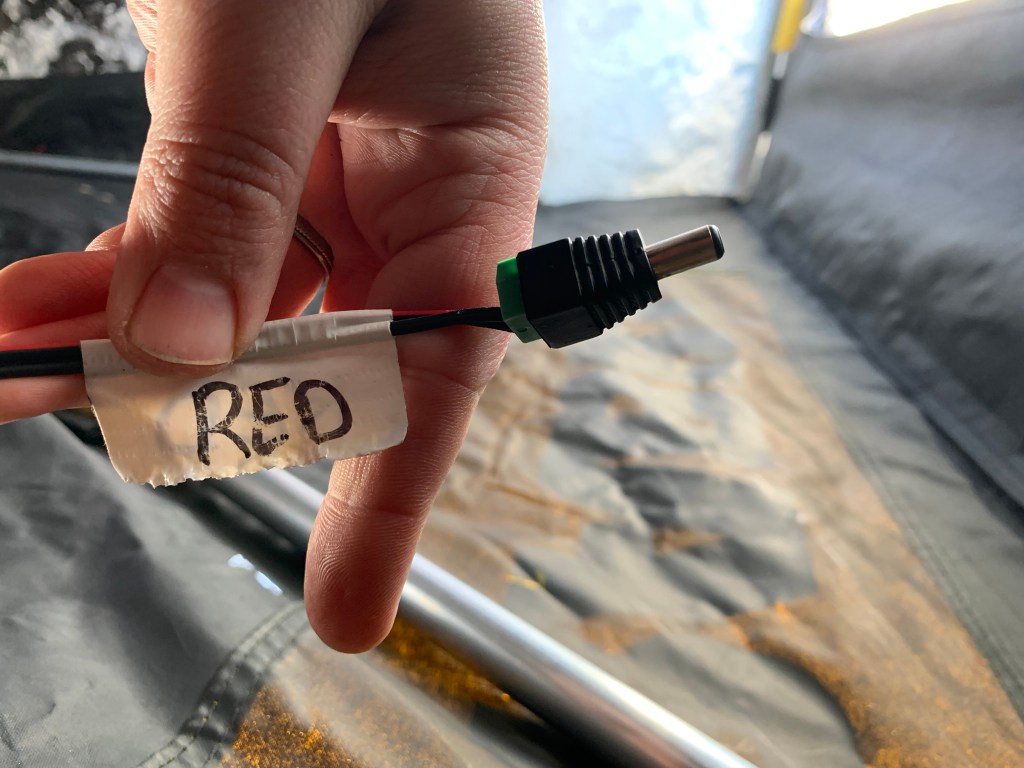
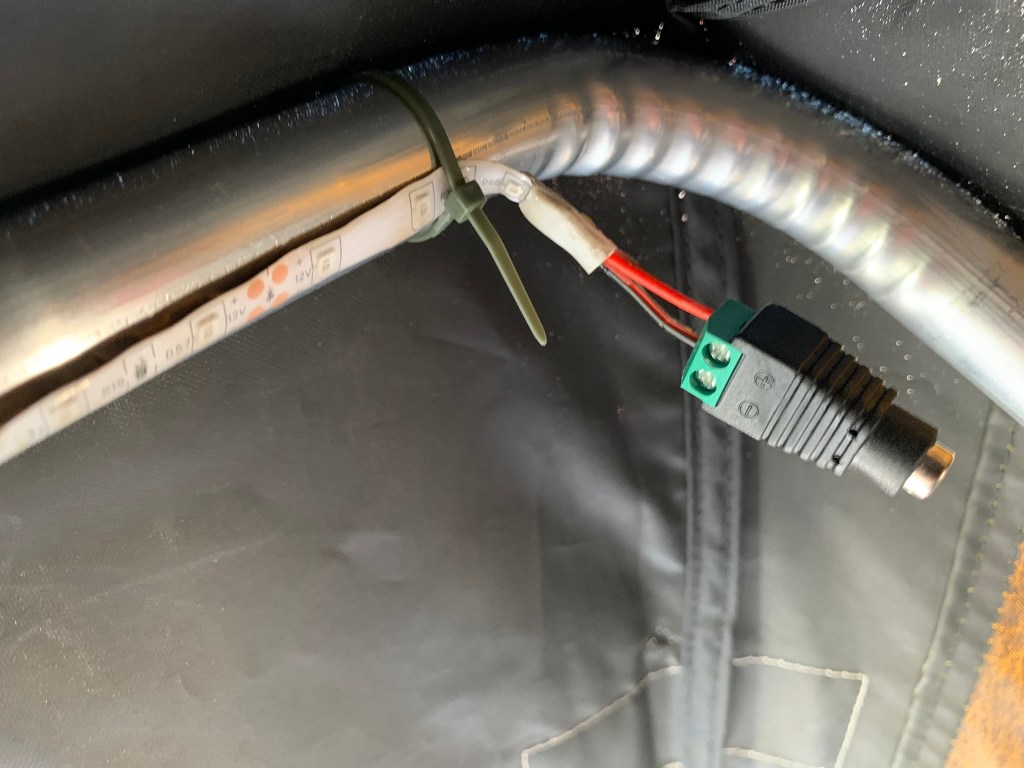
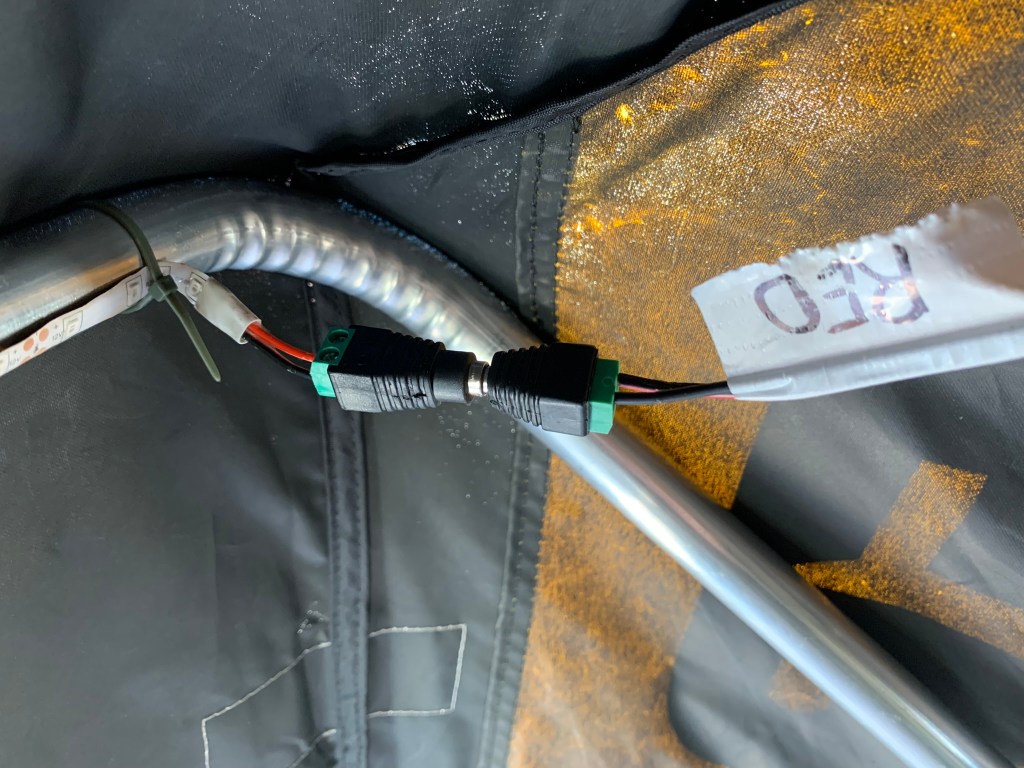
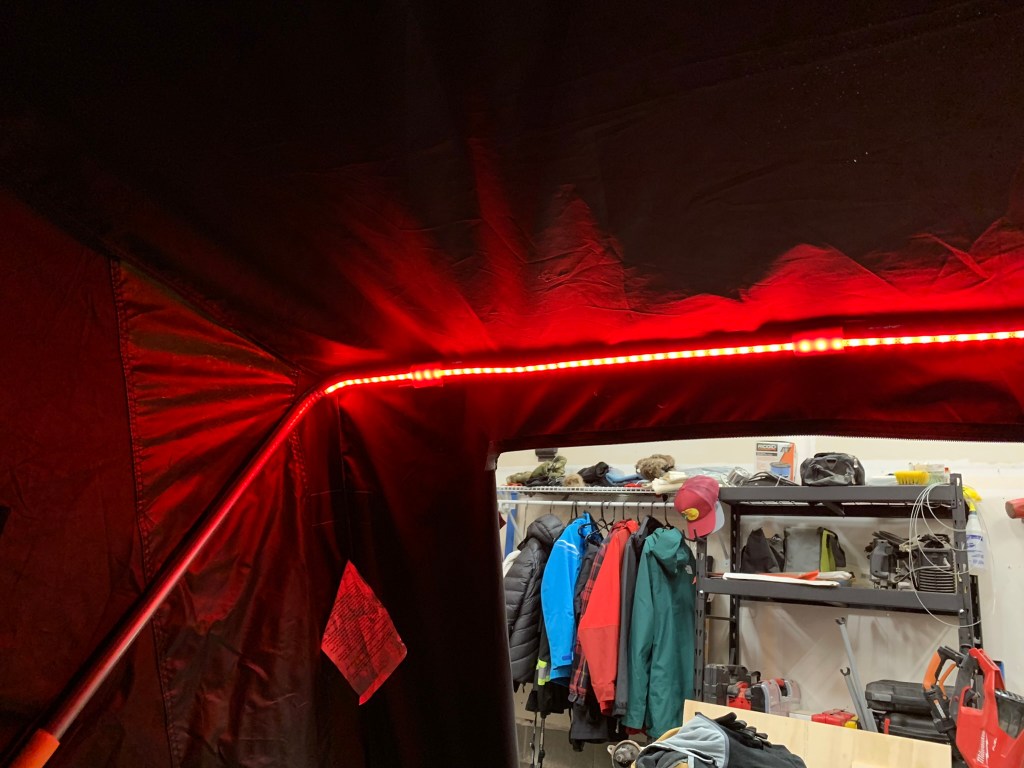
For the overhead lights I again use string LEDs from Wish. I fastened them to the overhead supports with the adhesive on the lights but also added some zip ties. This keeps the lights in place. I originally added quick disconnects at the ends of the LEDs but ended up changing them 5.5mm jacks simply for ease of connecting and disconnecting. I’ve found the spade connectors are sometimes quite tight (which is a good thing) but the wires are quite fine and the unplugging (on one occasion) ripped the connector right off. Yeah, my bad. So I picked up a package of these 5.5mm jacks that let you connect your positive and negative wires to each end. I found these were a good fit for the lights since the wiring is INCREDIBLY fine and will be handled more than any of the other wired areas.
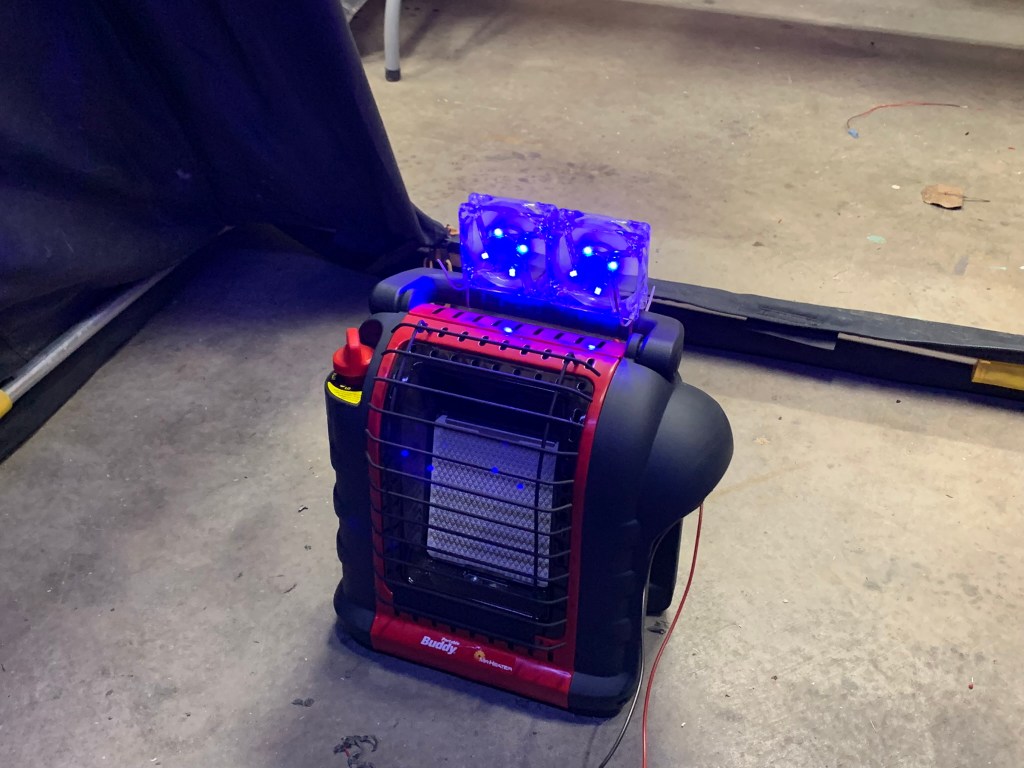
The heater fans I also picked up from Wish. A couple small computer fans with LEDs. I mounted these to the handle of my Buddy Heater with zip ties. Same idea as the overhead lights – I used quick disconnects for the wiring. These fans definitely move the heat around. I’ve had lots of people recommend a thermal fan like you’d set on a woodstove as they don’t require any power. I’m not opposed to that, just thought this was fun to do. If I do go that route in the future it just frees up a set of banana ports for something else – which I may have a plan for already…
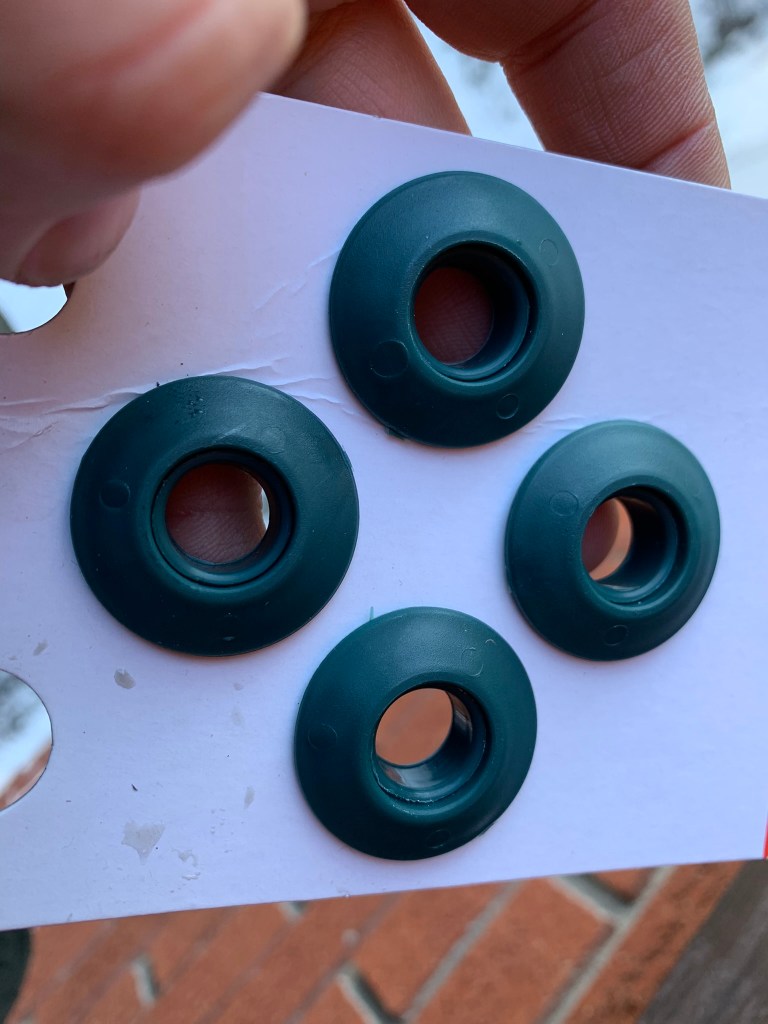
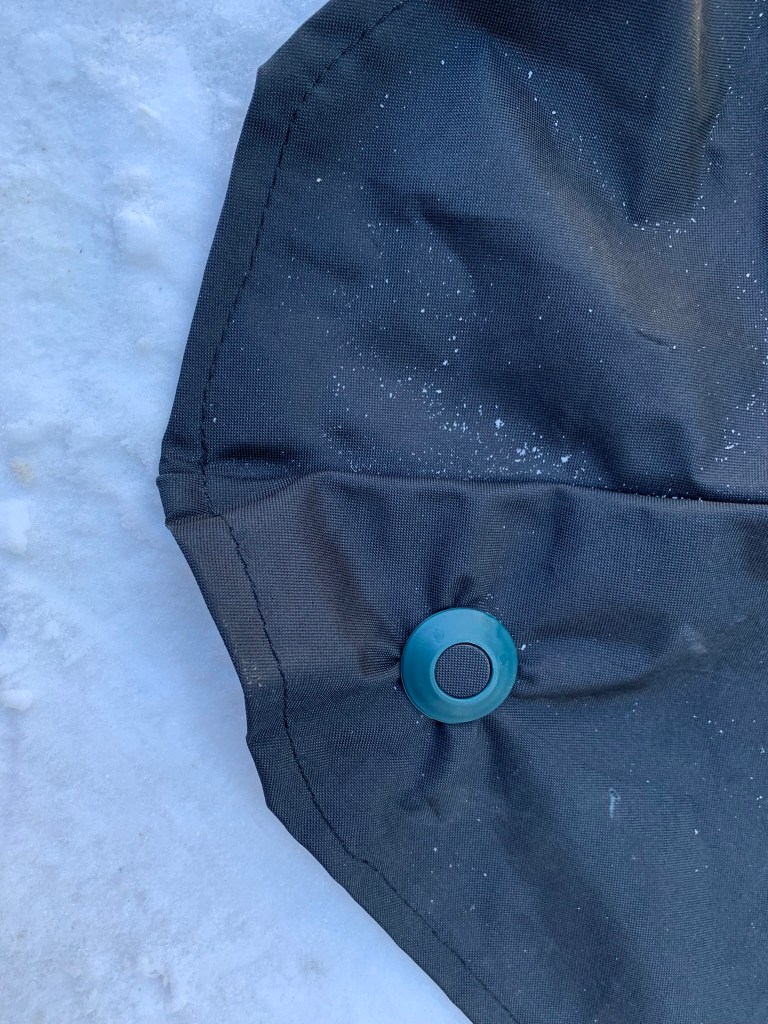
The last thing I did was add some grommets to the skirt. I read a few posts of people having to chase their flip-overs across the lake when the wind picks up – and I don’t like to run. I picked up a Frabill anchor kit for the tub itself – comes with bolts, washers, straps and anchors – but I haven’t installed them yet. I’m not so worried about the tub moving – as I’ve added a bit of weight to it, not to mention I’ll be parked on it most of the time – but I did want to try and limit the wind getting underneath the skirt and lifting it up. And yes, I will be banking snow around the tub, these grommets/anchors are more like an insurance policy. Plus, they weren’t expensive.
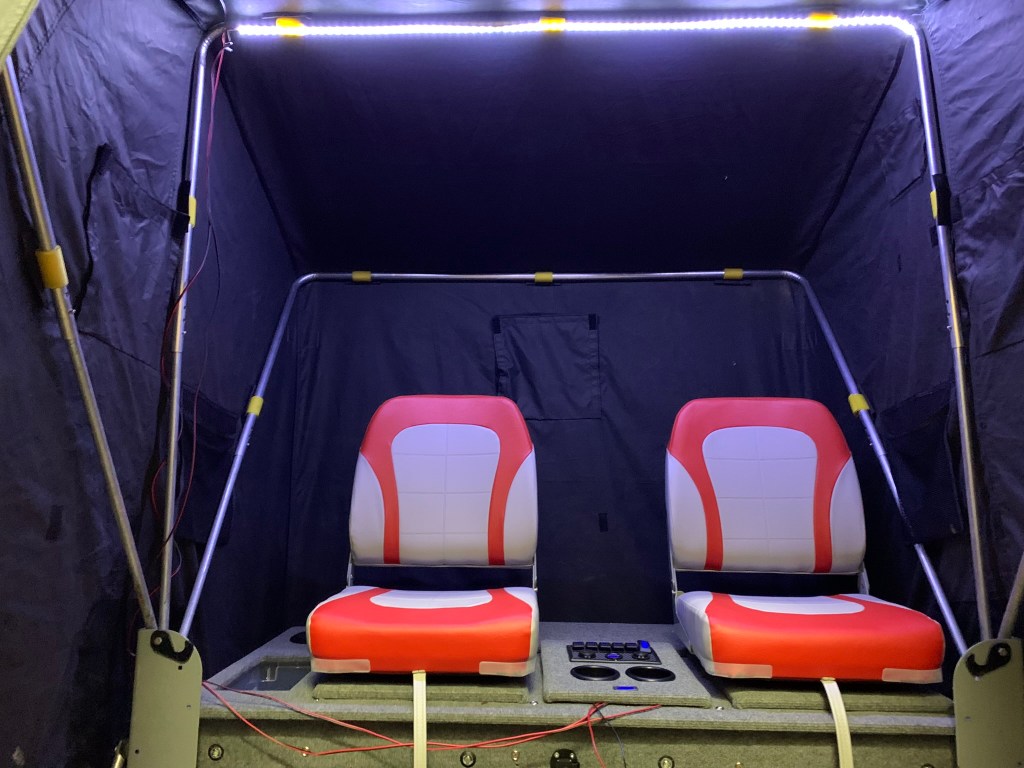
The Final Product
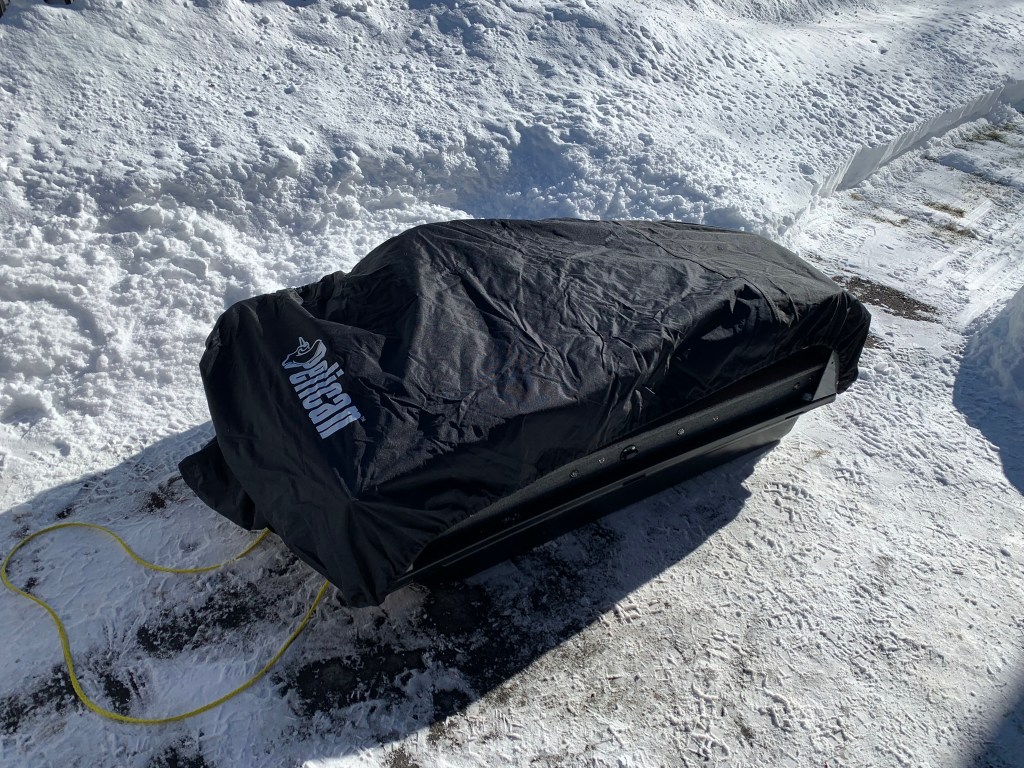
Lastly, I picked up a Pelican cover. It’s not a perfect fit, but I wanted this to, basically, keep the snow/rain/hail off the seats/console while in transit and also to hole my Buddy Heater and bait bucket in place in transit (they both sit behind the seats).
PICS OF FINAL PRODUCT. YOUTUBE OVERVIEW.
I’m happy with the final result of this build. Thankful for all the others that went before me and gave me so much inspiration and ideas. I picked up a Pelican 75 sled cover just for some added protection while in transit (mostly thinking of rain/snow while heel-toeing out on the ice).
With respect to the weight of the whole package. At the end of the day, did I add weight? Yes. Is it substantial? No. I can lift the entire insert out of the sled myself. Fully loaded I can easily load it in to my vehicle and pull it on the snow/ice by hand. The only real additional weight I’ve added is the plywood and 2x2s. Otherwise, I’d still be pulling a tent, chairs, power box, all the gear, etc. So none of that changed. All in all I added about 12 sq ft of 1/2″ plywood and maybe a bit of weight with the seats (would be minor).
The added weight is not significant to me. I can still hand bomb this shanty. And, important to me, was what I gained in terms of storage/functionality. Everything has a place and I love that. I think many people are deterred from this process due to the weight (as evidenced by my sharing on social media) and to each their own, I guess. For me, the added weight isn’t an issue. That being said, I only go out about 1-2km. If you’ve got a snow machine or ATV, even better.
Materials – these links will take you to websites where you can purchase the materials used in this build. Powder Keg Fishing receives a kick-back if you purchase through these links:
White LED Lights
Red LED Lights
Ground LED Lights
UV Lights
12v Computer Fans
Cup Holders
SAE Port
30-Cal Ammo Box
Electronics Console
5.5mm Connectors
12v Lithium Ion Battery
Banana Posts
12v Master Switch (Nuke launcher)
Battery Meter
Mr Heater Buddy Heater
Frabill Flip-over Ice Anchors
Check out some related posts:
Garmin Stricker CV 4 build
Portable Power Box Build
What about you? Have you “tricked your trap”? Thinking about it? Leave a comment!
